ATD Blog
5 Steps to Shooting Awesome Instructional Videos
Wed Dec 26 2018
Content
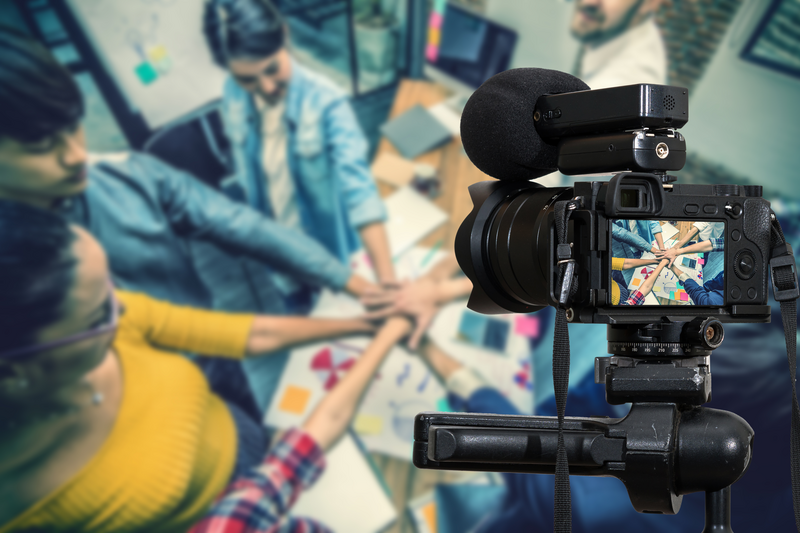
Many trainers shoot instructional videos using their cell phone. The quality of the image when the phone’s onboard camera is used, well, can be amazing. However, if you’re aiming to take your instructional video-making to the next level, you’ll want to use a dedicated video camera.
Many trainers shoot instructional videos using their cell phone. The quality of the image when the phone’s onboard camera is used, well, can be amazing. However, if you’re aiming to take your instructional video-making to the next level, you’ll want to use a dedicated video camera.
Content
Using a dedicated camera, whether it be a consumer camera or professional grade model, will give you greater control over every aspect of your video and provide more specialized tools to add specialist techniques that create more effective instructional videos.
Using a dedicated camera, whether it be a consumer camera or professional grade model, will give you greater control over every aspect of your video and provide more specialized tools to add specialist techniques that create more effective instructional videos.
Your Skills Are More Important Than the Camera Model
Content
Isn’t a dedicated video camera just more money? And what training department has loads of money to drop into video? Not surprisingly, the first question a lot of folks ask me is, “What’s the cheapest model I can get away with to make quality video?”
Isn’t a dedicated video camera just more money? And what training department has loads of money to drop into video? Not surprisingly, the first question a lot of folks ask me is, “What’s the cheapest model I can get away with to make quality video?”
Content
I asked the same question 15 years ago to a former BBC colleague. He suggested that I was asking the wrong question. “The real question,” he said, “is what’s the minimum level of camera skills you need to get good quality video?” He went on to say that skilled camera operators make video look good on whatever camera they use.
I asked the same question 15 years ago to a former BBC colleague. He suggested that I was asking the wrong question. “The real question,” he said, “is what’s the minimum level of camera skills you need to get good quality video?” He went on to say that skilled camera operators make video look good on whatever camera they use.
Content
And he’s right. I’ve seen a skilled camera operator use dinky little home-movie cameras to produce amazing videos—which is reassuring to trainers wanting to make instructional videos with small budgets. Following a few universal filming principles can ensure all your training videos look awesome.
And he’s right. I’ve seen a skilled camera operator use dinky little home-movie cameras to produce amazing videos—which is reassuring to trainers wanting to make instructional videos with small budgets. Following a few universal filming principles can ensure all your training videos look awesome.
The 5 Ites of Filming
Content
There are five steps you can take that will ensure your training videos are always crisp and clear. I call them the “five ites” because each word rhymes with “-ite” and that’s easy to remember when in the hustle and bustle of setting up shots. The five ites are:
There are five steps you can take that will ensure your training videos are always crisp and clear. I call them the “five ites” because each word rhymes with “-ite” and that’s easy to remember when in the hustle and bustle of setting up shots. The five ites are:
Content
Height—set the tripod.
Height—set the tripod.
Content
White—set the white balance.
White—set the white balance.
Content
Light—set the exposure.
Light—set the exposure.
Content
Tight—zoom in and focus.
Tight—zoom in and focus.
Content
Bright—adjust the audio levels.
Bright—adjust the audio levels.
Content
To follow each of these steps, you’ll need a camera that has manual functions with an external microphone and a tripod. The cheapest camera currently available that offers these manual functions is about $250. I use this camera in all my workshops for trainers on how to create professional-looking instructional videos.
To follow each of these steps, you’ll need a camera that has manual functions with an external microphone and a tripod. The cheapest camera currently available that offers these manual functions is about $250. I use this camera in all my workshops for trainers on how to create professional-looking instructional videos.
Content
Don’t laugh—people often come to my workshops with $2,000 cameras and tell me they’ll use their camera rather than my little entry-level consumer cameras. And almost always, the shots made by other participants following these steps look better than the shots from those who bring these big cameras with more functionality than even some professionals understand.
Don’t laugh—people often come to my workshops with $2,000 cameras and tell me they’ll use their camera rather than my little entry-level consumer cameras. And almost always, the shots made by other participants following these steps look better than the shots from those who bring these big cameras with more functionality than even some professionals understand.
Content
Let’s look at each step so you can get cracking.
Let’s look at each step so you can get cracking.
Content
Height—Set the Tripod
Height—Set the Tripod
Content
Shooting video without a tripod—the pros call this handheld—almost always assures shaky cam. Sometimes known as “queasy cam”, the picture appears wobbly, is distracting, and looks unprofessional. If you can’t find a tripod, use a monopod or set your camera on a stable object so the frame is steady.
Shooting video without a tripod—the pros call this handheld—almost always assures shaky cam. Sometimes known as “queasy cam”, the picture appears wobbly, is distracting, and looks unprofessional. If you can’t find a tripod, use a monopod or set your camera on a stable object so the frame is steady.
Content
Having steady shots isn’t just good from a visual perspective—there are good technical reasons for it too, but we don’t have space to go into that just now.
Having steady shots isn’t just good from a visual perspective—there are good technical reasons for it too, but we don’t have space to go into that just now.
Content
White—Set the White Balance
White—Set the White Balance
Content
White balance is a bit tricky to explain in just a few paragraphs. Let me just say, though, that setting the white balance every time you shoot is a skill that sets professionals apart from amateurs and will make your videos look polished.
White balance is a bit tricky to explain in just a few paragraphs. Let me just say, though, that setting the white balance every time you shoot is a skill that sets professionals apart from amateurs and will make your videos look polished.
Content
Basically, white balance is all about color temperature. The temperature of light indoors is different from that of light outdoors. If you look at a white piece of paper outside it’ll have a different color tone than when you look at it indoors. The human eye naturally adjusts, but the camera doesn’t. So, we need to tell the camera what true white is, and have it adjust all the other colors so they’re consistent.
Basically, white balance is all about color temperature. The temperature of light indoors is different from that of light outdoors. If you look at a white piece of paper outside it’ll have a different color tone than when you look at it indoors. The human eye naturally adjusts, but the camera doesn’t. So, we need to tell the camera what true white is, and have it adjust all the other colors so they’re consistent.
Content
Don’t miss this step!
Don’t miss this step!
Content
Light—Exposure
Light—Exposure
Content
You’ll notice that any professional video, such as what you see on TV, is well-lit. So, the first rule of lighting before you even touch the camera is to find a room or location that has lots of natural light. You can use a lighting kit, but that’s cumbersome; and developing good camera skills can save you that hassle in 70 percent of cases. The light source needs to shine on the person or object in the shot—not toward the camera.
You’ll notice that any professional video, such as what you see on TV, is well-lit. So, the first rule of lighting before you even touch the camera is to find a room or location that has lots of natural light. You can use a lighting kit, but that’s cumbersome; and developing good camera skills can save you that hassle in 70 percent of cases. The light source needs to shine on the person or object in the shot—not toward the camera.
Content
As far as your camera is concerned, you need to set the exposure level. On professional cameras this can involve playing with the iris and shutter speed. But for most consumer cameras, you just need to find the exposure settings in the camera’s menu and manually set them so that the most important element in your shot is easy to see. Not too dark where important details are lost. Not too late where everything looks washed out.
As far as your camera is concerned, you need to set the exposure level. On professional cameras this can involve playing with the iris and shutter speed. But for most consumer cameras, you just need to find the exposure settings in the camera’s menu and manually set them so that the most important element in your shot is easy to see. Not too dark where important details are lost. Not too late where everything looks washed out.
Content
Tight—Set the Focus
Tight—Set the Focus
Content
When white balance and exposure are set, it’s time to get the shot in focus. Blurry shots look unprofessional and make it difficult for learners to appreciate what you’re showing them. For traditional video cameras, you focus by zooming in tight on the most important element of the shot and adjusting the focus so that person or object is sharp. When filming a person, I usually set the focus on their eyes because that’s where most viewers will look first. For objects I look for a sharp line or edge to focus on.
When white balance and exposure are set, it’s time to get the shot in focus. Blurry shots look unprofessional and make it difficult for learners to appreciate what you’re showing them. For traditional video cameras, you focus by zooming in tight on the most important element of the shot and adjusting the focus so that person or object is sharp. When filming a person, I usually set the focus on their eyes because that’s where most viewers will look first. For objects I look for a sharp line or edge to focus on.
Content
Most video cameras have what’s called a parfocal lens. You don’t really need to know much about what this is other than it means you should zoom in tight on the person or object to set the focus. When you zoom out, any point along that zoom distance will be in focus. However, cameras like DSLR models that were originally built to shoot still images have different lenses (varifocal) and zooming in will not work—you need to set the shot size and then adjust the focus.
Most video cameras have what’s called a parfocal lens. You don’t really need to know much about what this is other than it means you should zoom in tight on the person or object to set the focus. When you zoom out, any point along that zoom distance will be in focus. However, cameras like DSLR models that were originally built to shoot still images have different lenses (varifocal) and zooming in will not work—you need to set the shot size and then adjust the focus.
Content
Bright—Set the Audio Levels
Bright—Set the Audio Levels
Content
You’ve got all the visual settings complete; now it’s time to set the audio. I use the term “bright” here because, well, it’s the closest I can find that rhymes with “ite”, and “bright” is a term that audio engineers use to describe a crisp recording with good high-end frequency response. So, it works.
You’ve got all the visual settings complete; now it’s time to set the audio. I use the term “bright” here because, well, it’s the closest I can find that rhymes with “ite”, and “bright” is a term that audio engineers use to describe a crisp recording with good high-end frequency response. So, it works.
Content
Hopefully, you’re using an external mic and not the microphone onboard the camera, because this is critical to getting good-quality audio. Assuming you are, find the audio level setting in your camera’s menu and adjust the levels so it averages around the -12db level. Most cameras will have a mark at -12db to make it easier to find.
Hopefully, you’re using an external mic and not the microphone onboard the camera, because this is critical to getting good-quality audio. Assuming you are, find the audio level setting in your camera’s menu and adjust the levels so it averages around the -12db level. Most cameras will have a mark at -12db to make it easier to find.
Now You’re Set
Content
Once you’ve been through these steps, you’re ready to shoot your video. That means framing each shot so it carefully tells a story or demonstrates the skill you want to teach. To consistently frame your shots so they are engaging, it’s a good idea follow the ancient “Rule of Thirds” and learn about shot sizes and camera angles, which all help you convey your message. But those belong to another conversation.
Once you’ve been through these steps, you’re ready to shoot your video. That means framing each shot so it carefully tells a story or demonstrates the skill you want to teach. To consistently frame your shots so they are engaging, it’s a good idea follow the ancient “Rule of Thirds” and learn about shot sizes and camera angles, which all help you convey your message. But those belong to another conversation.
Avoid Auto Functions
Content
You’ll notice that each of these steps requires you to manually adjust the camera’s settings. A lot of folks ask me, “Why not use auto functions, like autofocus?” There are two reasons.
You’ll notice that each of these steps requires you to manually adjust the camera’s settings. A lot of folks ask me, “Why not use auto functions, like autofocus?” There are two reasons.
Content
The first reason is that using autofocus is giving up control of how your shot will look. The camera does not know what light setting you want or the style and tone of the video you are shooting. It’s like asking your camera to guess what you want. Sometimes it will work out, but other times it won’t.
The first reason is that using autofocus is giving up control of how your shot will look. The camera does not know what light setting you want or the style and tone of the video you are shooting. It’s like asking your camera to guess what you want. Sometimes it will work out, but other times it won’t.
Content
The second reason is that most cameras continue to adjust these settings while you are filming. Let’s say your shot involves someone walking into a room, opening a door, and that door floods light into the room. The auto exposure in your camera will open and close the iris, which looks really unnatural and unprofessional. If someone is moving toward the camera, the camera will adjust the focus and it will go between being blurry and clear—once again, unnatural.
The second reason is that most cameras continue to adjust these settings while you are filming. Let’s say your shot involves someone walking into a room, opening a door, and that door floods light into the room. The auto exposure in your camera will open and close the iris, which looks really unnatural and unprofessional. If someone is moving toward the camera, the camera will adjust the focus and it will go between being blurry and clear—once again, unnatural.
Shooting Good Video
Content
It’s amazing how consistently good your videos will look if you follow these steps every time you shoot a scene for your instructional videos. It may seem like a lot of effort—five steps when you could easily set the camera to auto function. But after you’ve followed these steps 10 to 20 times in your practice, you’ll find it becomes a healthy habit that ensures every training video looks clear and professional.
It’s amazing how consistently good your videos will look if you follow these steps every time you shoot a scene for your instructional videos. It may seem like a lot of effort—five steps when you could easily set the camera to auto function. But after you’ve followed these steps 10 to 20 times in your practice, you’ll find it becomes a healthy habit that ensures every training video looks clear and professional.
Content
Jonathan Halls is author of Rapid Video Development for Trainers , Rapid Media Development for Trainers , and Video Script Writing. Based in Washington, D.C., he is CEO of Trainer Mojo LLC, which runs media workshops for trainers who want to make digital learning content. He draws on almost 30 years’ professional experience as a media trainer, having formerly headed up the BBC’s prestigious Television Training department.
Jonathan Halls is author of Rapid Video Development for Trainers, Rapid Media Development for Trainers, and Video Script Writing. Based in Washington, D.C., he is CEO of Trainer Mojo LLC, which runs media workshops for trainers who want to make digital learning content. He draws on almost 30 years’ professional experience as a media trainer, having formerly headed up the BBC’s prestigious Television Training department.
View Courses Recommended for You