ATD Blog
Create Effective Microlearning in Record Time With PowerPoint: Storytelling With Morph
Wed Jul 22 2020

Content
The Morph transition in PowerPoint can be useful in various storytelling techniques. It’s quick and easy to use and produces some stunning effects.
The Morph transition in PowerPoint can be useful in various storytelling techniques. It’s quick and easy to use and produces some stunning effects.
Content
For example, mobile screenshots are annoying in most microlearning and e-learning scenarios. As you’re developing in a landscape orientation, for example, the screenshot is often portrait, which means you have to scroll. Well, you can scroll easily using the Morph transition in PowerPoint.
For example, mobile screenshots are annoying in most microlearning and e-learning scenarios. As you’re developing in a landscape orientation, for example, the screenshot is often portrait, which means you have to scroll. Well, you can scroll easily using the Morph transition in PowerPoint.

Content
In edit mode, it’s made up of two slides. The screenshot on the first is focused on the top of the website, while the screenshot on the other is focused on the bottom of the website.
In edit mode, it’s made up of two slides. The screenshot on the first is focused on the top of the website, while the screenshot on the other is focused on the bottom of the website.

Content
They are actually the same picture cropped differently, so if you open the crop tool you'll see that the rest of the screenshot is there, just grayed out.
They are actually the same picture cropped differently, so if you open the crop tool you'll see that the rest of the screenshot is there, just grayed out.
Content
To make the scrolling effect work, you can copy the screenshot from one slide and paste it into the second slide so the same image is on both slides. Now, open the crop tool and reposition the image within the crop frame so that on the second slide the focus is on the bottom portion of the website image.
To make the scrolling effect work, you can copy the screenshot from one slide and paste it into the second slide so the same image is on both slides. Now, open the crop tool and reposition the image within the crop frame so that on the second slide the focus is on the bottom portion of the website image.
Content
Then, go to the transitions tab on the ribbon and, on the second slide, choose the Morph transition. This recognizes that the screenshot image is the same on both slides, just with a different crop frame. In slide show mode, it will reframe the image, giving you that nice scrolling effect that works seamlessly. And it takes only a few seconds to create.
Then, go to the transitions tab on the ribbon and, on the second slide, choose the Morph transition. This recognizes that the screenshot image is the same on both slides, just with a different crop frame. In slide show mode, it will reframe the image, giving you that nice scrolling effect that works seamlessly. And it takes only a few seconds to create.
Content
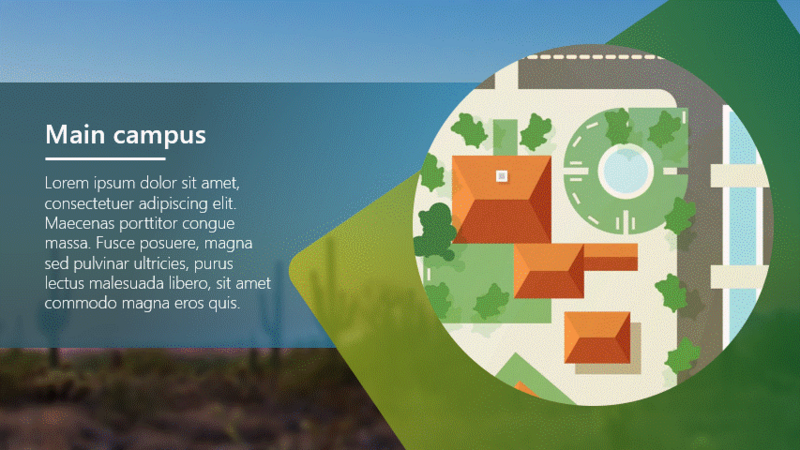
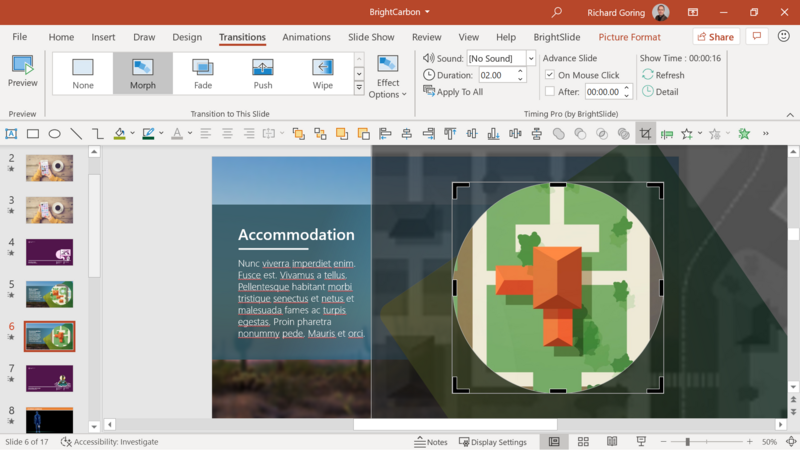
You can also use the same technique to show highlights of other detailed content like a map. If you highlight one part of the map using the crop tools (in this example cropped to a circle shape), perhaps with some details to the side, you can use Morph to pan across the map to a different portion of the map image. It’s the same technique of copying the map image to a second slide, opening the crop tool, and repositioning the image within it. Applying the Morph transition to the second slide means that you can move the map within the circular crop frame. It’s a great technique to quickly and easily focus attention what's important.
You can also use the same technique to show highlights of other detailed content like a map. If you highlight one part of the map using the crop tools (in this example cropped to a circle shape), perhaps with some details to the side, you can use Morph to pan across the map to a different portion of the map image. It’s the same technique of copying the map image to a second slide, opening the crop tool, and repositioning the image within it. Applying the Morph transition to the second slide means that you can move the map within the circular crop frame. It’s a great technique to quickly and easily focus attention what's important.
Content
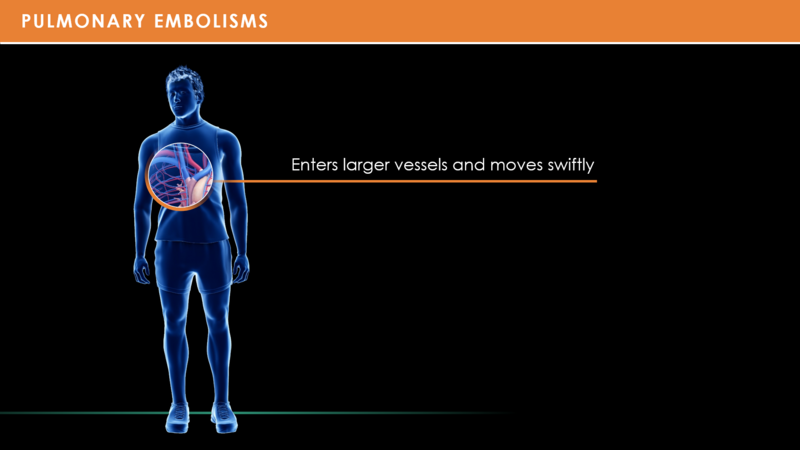
And then you can really push it by building complex stories with Morph. Below we have the lovely topic of pulmonary embolisms, where you're highlighting various elements within the body to demonstrate one of the causes of PE from deep vein thrombosis—a lovely topic, but one that is often the kind of subject you’d have to cover, something technical and detailed.
And then you can really push it by building complex stories with Morph. Below we have the lovely topic of pulmonary embolisms, where you're highlighting various elements within the body to demonstrate one of the causes of PE from deep vein thrombosis—a lovely topic, but one that is often the kind of subject you’d have to cover, something technical and detailed.

Content
The technique to make this work is the same, but in this case you have two different images laid on top of each other. To make the sequence work, align the images on top of each other then select the vascular system image and use the crop tool to focus on just the relevant portion of the image. Then, selecting the slide in the thumbnails on the left, duplicate it. On the second slide, take the cropped image and just recrop it so that it's covering a different area.
The technique to make this work is the same, but in this case you have two different images laid on top of each other. To make the sequence work, align the images on top of each other then select the vascular system image and use the crop tool to focus on just the relevant portion of the image. Then, selecting the slide in the thumbnails on the left, duplicate it. On the second slide, take the cropped image and just recrop it so that it's covering a different area.
Content
If you apply the Morph transition to the second slide, you’ll see a smooth transition between the two in slide show mode. You can then duplicate the second slide and recrop the vascular image into a different position on the third slide and apply the Morph transition, and so on, as many times as you need to highlight each stage of the process.
If you apply the Morph transition to the second slide, you’ll see a smooth transition between the two in slide show mode. You can then duplicate the second slide and recrop the vascular image into a different position on the third slide and apply the Morph transition, and so on, as many times as you need to highlight each stage of the process.
Content
You can take things even further with more techniques on storytelling with Morph , or using the Morph transition to create stunning design .
You can take things even further with more techniques on storytelling with Morph, or using the Morph transition to create stunning design.
Content
So, there you have it—some quick and easy ways to create amazing visual sequences for use in microlearning, e-learning, presentations, and animations. You can export these sequences to a video to ensure they play well in any other authoring tool, and you can find a lot more techniques and ideas like this on the BrightCarbon website . Have fun exploring all the possibilities.
So, there you have it—some quick and easy ways to create amazing visual sequences for use in microlearning, e-learning, presentations, and animations. You can export these sequences to a video to ensure they play well in any other authoring tool, and you can find a lot more techniques and ideas like this on the BrightCarbon website. Have fun exploring all the possibilities.
Content
For more tips and ideas join me during ATD Virtual Conference: Unleash Potential (October 26–30, 2020) for the session Awesome PowerPoint Techniques for Effective Presentations.
For more tips and ideas join me during ATD Virtual Conference: Unleash Potential (October 26–30, 2020) for the session Awesome PowerPoint Techniques for Effective Presentations.